How to Add a Fingerprint to a Smart Lock
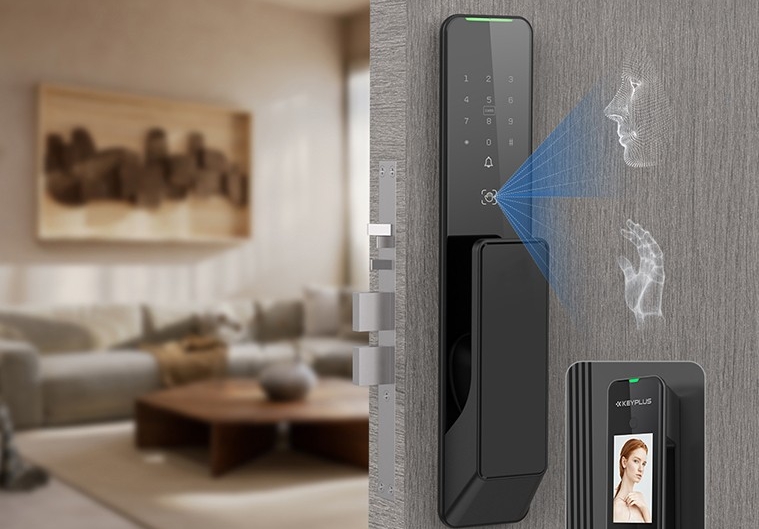
Smart locks have revolutionized home security by offering keyless entry through advanced authentication methods like fingerprints. Adding a fingerprint to a smart lock is a simple yet crucial process that ensures quick and secure access to your property. This guide will walk you through the necessary steps while addressing common troubleshooting tips and best practices.
Why Use Fingerprint Recognition in Smart Locks?
Before diving into the setup process, it’s important to understand why fingerprint authentication is beneficial:
-
Convenience: No need to carry keys or remember codes.
-
Security: Fingerprints are unique and difficult to replicate.
-
Speed: Faster than entering a PIN or using a physical key.
-
Access Control: You can grant or revoke access remotely.
Now, let’s go through the step-by-step process of adding a fingerprint to your smart lock.
Step 1: Prepare Your Smart Lock for Setup
Before registering a fingerprint, ensure your smart lock is properly installed and powered. Most smart locks operate on batteries, so check that they are charged or replaced if needed.
-
Check the Lock’s Status:
-
Ensure the lock is in pairing mode (if required).
-
Some models require an initial setup via a mobile app before fingerprint enrollment.
-
-
Install the Accompanying App (If Applicable):
-
Download the manufacturer’s app from the App Store or Google Play.
-
Follow the in-app instructions to connect the lock to your Wi-Fi or Bluetooth.
-
Step 2: Enter the Admin or Programming Mode
Smart locks typically require admin privileges to add new fingerprints. Here’s how to access the programming mode:
-
Use the Admin Code or Keycard:
-
Enter the default or custom admin PIN on the keypad.
-
Alternatively, tap an admin keycard if your lock supports it.
-
-
Physical Button Combination:
-
Some locks require pressing a hidden button or a specific sequence (e.g., holding the “#” key for 3 seconds).
-
-
Voice or App Command:
-
If your lock supports voice assistants (like Alexa or Google Assistant), you may enable setup via voice.
-
Alternatively, use the app to enter the admin dashboard.
-
Once in admin mode, the lock will prompt you to add a new user.
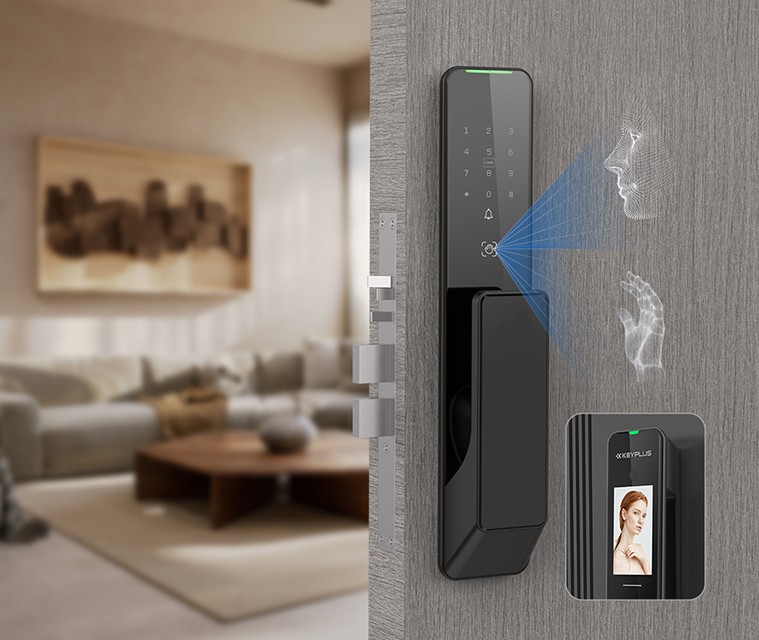
Step 3: Register the Fingerprint
Now, you’re ready to scan and store the fingerprint. Follow these best practices for optimal recognition:
-
Choose the Right Finger:
-
Use an index or thumb finger for better consistency.
-
Avoid fingers with cuts, scars, or wet/dirty surfaces.
-
-
Positioning the Finger Correctly:
-
Place your finger flat on the scanner without pressing too hard.
-
Follow the lock’s prompts—some require multiple scans at slight angles.
-
-
Multiple Scans for Better Accuracy:
-
Some locks ask for 3-5 scans of the same finger to improve recognition.
-
Rotate your finger slightly each time to capture different angles.
-
-
Assign a User Profile (If Applicable):
-
If the lock supports multiple users, label the fingerprint (e.g., “John – Right Thumb”).
-
-
Confirm and Save:
-
Once scanned, the lock may beep or flash to confirm success.
-
Exit admin mode to prevent unauthorized changes.
-
Step 4: Test the Fingerprint
Before relying on the fingerprint for daily use, test it:
-
Lock and Unlock the Door:
-
Place your registered finger on the scanner to unlock.
-
Ensure the response is quick and consistent.
-
-
Troubleshoot Recognition Issues:
-
If the lock fails to recognize the print, clean the scanner and your finger.
-
Re-scan the fingerprint if errors persist.
-
Step 5: Manage and Delete Fingerprints (Optional)
Over time, you may need to update or remove fingerprints. Here’s how:
-
Adding More Fingerprints:
-
Repeat the admin mode process to add additional users.
-
-
Deleting a Fingerprint:
-
Access admin mode, select the fingerprint, and choose “Delete.”
-
-
Resetting All Fingerprints:
-
Some locks have a factory reset option—use this with caution, as it erases all stored data.
-
Common Issues and Solutions
| Problem | Possible Solution |
|---|---|
| Fingerprint not recognized | Clean the scanner, re-scan the finger, or try a different finger. |
| Lock not responding | Check battery levels, restart the lock, or reset Wi-Fi/Bluetooth. |
| Slow recognition | Ensure proper finger placement and avoid wet/dirty fingers. |
| Admin mode inaccessible | Verify the admin PIN or refer to the manual for reset instructions. |
Best Practices for Fingerprint Smart Locks
To maximize security and convenience:
-
Register Multiple Fingers: In case one is injured or dirty.
-
Update Scans Periodically: Re-scan fingerprints every few months for better accuracy.
-
Combine Authentication Methods: Use fingerprint + PIN for high-security areas.
-
Keep the Scanner Clean: Dust and smudges can affect performance.
Conclusion
Adding a fingerprint to a smart lock is a straightforward process that enhances both security and convenience. By following these steps—preparing the lock, entering admin mode, scanning fingerprints correctly, and testing functionality—you can ensure seamless access to your home. If issues arise, troubleshooting tips and best practices will help maintain optimal performance.
With fingerprint recognition, you’re one step closer to a keyless, futuristic home security system. Enjoy the ease of touch-entry while keeping your property safe!
Related Blog
 https://www.keyplusystem.com/wp-content/uploads/2026/05/image-20260530-120210-1.png
1024
1536
Wu, Wendy
/wp-content/uploads/2023/05/logo.png
Wu, Wendy2026-05-30 04:02:212026-05-30 04:02:23Most Secure Smart Lock Trends for B2B Buyers | KEYPLUS
https://www.keyplusystem.com/wp-content/uploads/2026/05/image-20260530-120210-1.png
1024
1536
Wu, Wendy
/wp-content/uploads/2023/05/logo.png
Wu, Wendy2026-05-30 04:02:212026-05-30 04:02:23Most Secure Smart Lock Trends for B2B Buyers | KEYPLUS https://www.keyplusystem.com/wp-content/uploads/2026/05/image-20260530-060323.png
1024
1536
Wu, Wendy
/wp-content/uploads/2023/05/logo.png
Wu, Wendy2026-05-29 22:03:352026-05-29 22:03:37WiFi Door Knob Market Trends for 2024 Buyers
https://www.keyplusystem.com/wp-content/uploads/2026/05/image-20260530-060323.png
1024
1536
Wu, Wendy
/wp-content/uploads/2023/05/logo.png
Wu, Wendy2026-05-29 22:03:352026-05-29 22:03:37WiFi Door Knob Market Trends for 2024 Buyers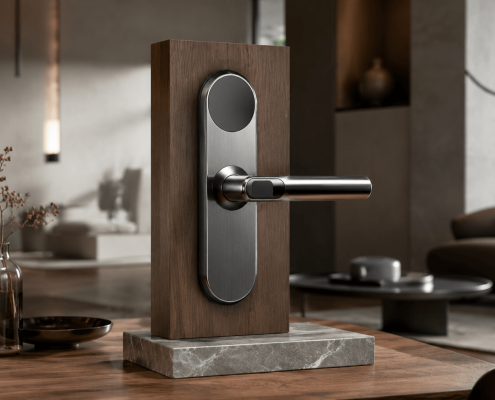 https://www.keyplusystem.com/wp-content/uploads/2026/05/image-20260529-120204.png
1024
1536
Wu, Wendy
/wp-content/uploads/2023/05/logo.png
Wu, Wendy2026-05-29 04:02:162026-05-29 04:02:18Thumbprint Door Handle Market Trends | KEYPLUS
https://www.keyplusystem.com/wp-content/uploads/2026/05/image-20260529-120204.png
1024
1536
Wu, Wendy
/wp-content/uploads/2023/05/logo.png
Wu, Wendy2026-05-29 04:02:162026-05-29 04:02:18Thumbprint Door Handle Market Trends | KEYPLUS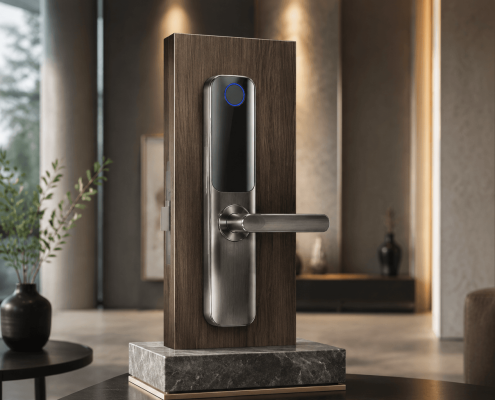 https://www.keyplusystem.com/wp-content/uploads/2026/05/image-20260529-060241.png
1024
1536
Wu, Wendy
/wp-content/uploads/2023/05/logo.png
Wu, Wendy2026-05-28 22:02:522026-05-28 22:02:54Biometric Door Locks for Business: A Strategic Guide for Buyers
https://www.keyplusystem.com/wp-content/uploads/2026/05/image-20260529-060241.png
1024
1536
Wu, Wendy
/wp-content/uploads/2023/05/logo.png
Wu, Wendy2026-05-28 22:02:522026-05-28 22:02:54Biometric Door Locks for Business: A Strategic Guide for Buyers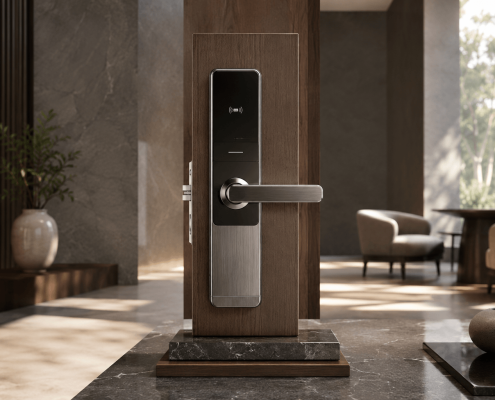 https://www.keyplusystem.com/wp-content/uploads/2026/05/image-20260529-000244.png
1024
1536
Wu, Wendy
/wp-content/uploads/2023/05/logo.png
Wu, Wendy2026-05-28 16:02:552026-05-28 16:02:57Commercial WiFi Door Lock Market Trends and Buyer Insights
https://www.keyplusystem.com/wp-content/uploads/2026/05/image-20260529-000244.png
1024
1536
Wu, Wendy
/wp-content/uploads/2023/05/logo.png
Wu, Wendy2026-05-28 16:02:552026-05-28 16:02:57Commercial WiFi Door Lock Market Trends and Buyer Insights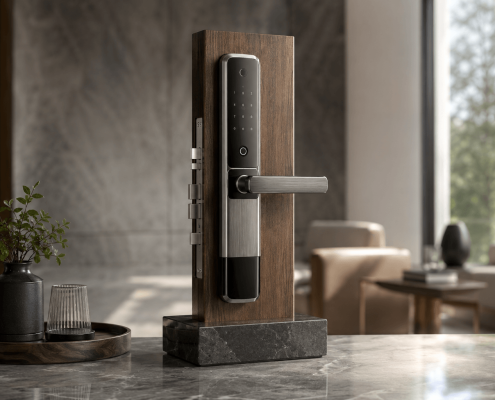 https://www.keyplusystem.com/wp-content/uploads/2026/05/image-20260528-180243.png
1024
1536
Wu, Wendy
/wp-content/uploads/2023/05/logo.png
Wu, Wendy2026-05-28 10:02:572026-05-28 10:02:58Digital Lock for Main Door: Market Trends and Buyer Insights | KEYPLUS
https://www.keyplusystem.com/wp-content/uploads/2026/05/image-20260528-180243.png
1024
1536
Wu, Wendy
/wp-content/uploads/2023/05/logo.png
Wu, Wendy2026-05-28 10:02:572026-05-28 10:02:58Digital Lock for Main Door: Market Trends and Buyer Insights | KEYPLUS
